Seicane Tips: How to Upgrade 2013-2016 BMW 5 Series F10 F11 (NBT System) Factory Radio
Shenzhen, China, 8th Nov 2021, ZEXPRWIRE, Thanks to the GPS Navigation technologies, now we can drive to everywhere in a quick and safe route. While if there is no navigation function in your car radio or it just only comes with a small size screen, I would suggest you to install an upgraded Android GPS radio system in your car. As we all know, in most of time, not knowing where you’re going can’t be a good thing, you need a navigation system you can trust.
One important thing I should illustrate in advance, here we are not guiding you how to choose and purchase quality touchscreen radio, but we are showing you how to install a new radio from Seicane in a car since for most people, they want to know more information about replacing factory radio by themselves, instead of knowing more radio brands, price differences etc. Let’s check the installation guide following.
- Car model: 2013 2014 2015 2016 BMW 5 Series F10 F11 (NBT System)
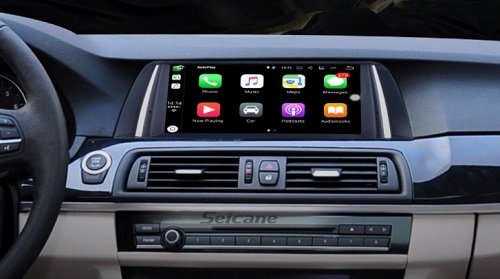
- New radio: 10.25″ HD Touchscreen Android GPS Radio System (Seicane H812)
- Working tools: Plastic pry tools, screwdrivers.
- Safety tip: Power off the car before working on the radio system, ensuring safety.
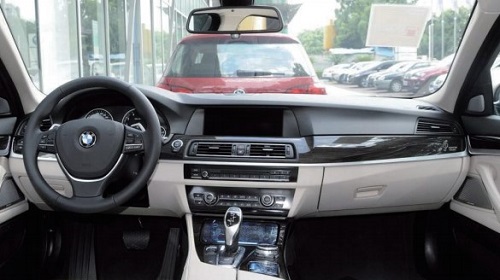
See the factory radio system below.
Part 1, Steps of removing the original radio in BMW vehicles
Step 1, Use plastic pry tool to remove the A/C panel. Be careful not to scratch the panel.
Step 2, Take down the A/C panel and disconnect the plug.
Step 3, Remove two screws that fixed the car radio screen, one on left side, another on right side.
Step 4, Take down the car screen and unplug the connectors.
Step 5, Remove two screws that fixed the DVD button panel.
Step 6, Pry to remove the A/C button panel.
Step 7, Take out the DVD unit, unplug the power cable and the fiber optical connector (if with OEM fiber optical).
Part 2, Steps of installing the new GPS Navigation Radio System
Step 8, Before using the aftermarket car radio with GPS, check its parts whether in good condition.
Step 9, Use new cable to connect the unplugged fiber optical connector (if with OEM fiber optical).
Step 10, Then connect other new cables to the DVD unit, and install it back to the dashboard.
Step 11, Install back the DVD button panel as well as A/C button panel.
Step 12, Connect the new radio screen and fix it well.
Step 13, Finally, install back the A/C panel.
Step 14, You can turn on the car to use the new radio system to check whether everything works normally. If there is problem, it’s advised to double check the wiring condition and ask professional after-sale service if needed.
Part 3, Something you may want to check in this Seicane GPS navigation stereo
| Configuration Parameter | Equipped with 10.25” IPS screen (touchscreen) with HD resolution, Android 10.0 system, 2GB/4GB RAM, 32GB/64GB ROM, 4/8-core CPU |
| Features & Functions | Support all original car functions.The product only exchanges the original car TFT monitor. It’s easy to install. No Gap, OEM Style.There are built-in Bluetooth, Carplay and DSP setting.Integrates multiple entertainment functions.Support rear view camera, DVR, OBDII and so on. |
Interested people can contact below in case of any queries, and to shop, visit: https://www.seicane.com/ and enjoy the best of Seicane!
Media Contacts
Tel: +86 (0)755-8658 6800
Fax: +86 (0)755-8658 6630
Address: Floor A2, Building 22, Second Industrial Area, Nanhuan Road, Ma’an Hill Community, Shajing Street, Baoan District, Shenzhen City, Guangdong Province, China
Email: [email protected]
